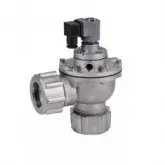
Dust Collector Valve service life depends on operating conditions, maintenance, and the quality of its diaphragm and other wear parts. There is no single replacement interval that fits every dust collection system. Use the valve maker's cycle rating and inspection guidance alongside your own operating records to plan maintenance and reduce unexpected downtime.
For purchasing and maintenance teams, the practical questions are when performance starts to decline, which parts can be replaced, and whether a replacement valve will fit the existing system. This guide explains how to answer those questions and how to inspect a valve step by step. Xingyu provides dust collection components and product information to help buyers compare options. 
How long does a Dust Collector Valve typically last?
Use operating conditions rather than a fixed calendar estimate
A Dust Collector Valve may operate for years, but service life varies widely between installations. A valve that opens frequently in a clean, dry system may wear differently from one exposed to abrasive dust, moisture, high temperatures, or unstable compressed air. Treat any general lifespan estimate as a planning guide, not a guarantee.
- Check the valve manufacturer's rated cycle life and recommended service conditions.
- Record actual operating cycles or pulse frequency when the controller provides that information.
- Track repairs, diaphragm changes, air leaks, and changes in cleaning performance.
- Replace or repair a valve based on condition and performance, not age alone.
Distinguish valve body life from wear-part life
The valve body can remain serviceable while the diaphragm, seals, or pilot components wear out. Before replacing the complete assembly, identify which part has failed and confirm whether the manufacturer supplies compatible service kits. A repair is worthwhile only when the body is undamaged and the replacement parts are available and suitable for the application.
What determines Dust Collector Valve service life?
Operating cycles, pressure, and compressed-air quality matter
Every pulse places demand on the diaphragm and moving parts. A high pulse rate can increase wear, while pressure outside the valve's specified range can prevent reliable opening and closing. Water, oil, rust, and particles in the compressed-air supply can also interfere with pilot passages and sealing surfaces.
- Cycle rate: frequent pulsing can increase mechanical wear.
- Air pressure: pressure must remain within the product specification.
- Air cleanliness: moisture, oil, and particles may impair valve operation.
- Temperature: heat or cold beyond the rated range can affect seals and materials.
- Dust conditions: abrasive or corrosive material can damage exposed components.
- Installation: poor alignment, unsuitable fittings, or vibration can contribute to leaks and premature failure.
Maintenance and system matching also affect longevity
A correctly sized valve connected to a suitable manifold and controller is more likely to operate as intended. Regular checks can identify a leak or weak pulse before it affects the entire collector. Confirm that the valve's port size, voltage, pressure range, connection type, and materials match the system and the site's conditions.
What are the signs that a Dust Collector Valve needs attention?
Look for changes in sound, air use, and cleaning performance
A failing valve may pulse weakly, pulse irregularly, leak air continuously, or fail to operate when commanded. These symptoms can also come from the controller, solenoid, wiring, air supply, or blocked lines. Check the whole control and air system before deciding that the valve itself is faulty.
- Continuous hissing or air leakage around the valve or exhaust.
- Weak, delayed, inconsistent, or missing cleaning pulses.
- Higher compressed-air consumption without a process change.
- Dust buildup on filter elements or a rise in differential pressure.
- Visible diaphragm damage, cracked seals, corrosion, or loose connections.
- Repeated valve faults or unplanned maintenance on the same position.
Separate valve symptoms from other system faults
Check whether the controller sends the correct signal and whether the solenoid receives its specified voltage. Confirm the compressed-air supply is stable and the tubing and passages are clear. If other valves show similar symptoms, investigate a shared air supply or controller issue before replacing individual valves.
How do you inspect a Dust Collector Valve step by step?
Gather the required tools and safety equipment
Use the tools specified by the equipment and valve manufacturers. The exact requirements depend on the valve design and installation.
- Lockout and tagout equipment for the electrical and pneumatic supplies.
- Safety glasses, suitable gloves, and any site-required protective equipment.
- Correct hand tools for the valve fasteners and air connections.
- A flashlight and inspection mirror, if access is restricted.
- A multimeter for qualified electrical checks, where appropriate.
- A pressure gauge or approved leak-check method, if required by the site procedure.
- The valve manual, wiring diagram, and maintenance record.
Follow a controlled inspection sequence
- First, review the valve nameplate and manual. Note the model, pressure range, voltage, connection details, and any manufacturer warnings.
- Second, notify affected personnel and stop the dust collector according to the site's maintenance procedure.
- Third, isolate and lock out electrical power and compressed air. Depressurize the relevant line and verify that stored energy has been released before opening or loosening a connection.
- Fourth, inspect the valve body, fittings, wiring, tubing, and nearby manifold for leaks, corrosion, cracks, looseness, or physical damage. Do not remove parts while the system is pressurized.
- Fifth, check the maintenance history and compare the affected valve with a known working valve, where the design permits a safe comparison.
- Sixth, inspect the diaphragm and seals only as directed by the manufacturer. Look for tears, deformation, hardening, contamination, or wear.
- Seventh, if electrical troubleshooting is needed, have a qualified person check the controller output, wiring, and solenoid against the wiring diagram and rated specifications.
- Eighth, replace only damaged or worn parts with compatible components. Follow the specified assembly method and tightening instructions.
- Ninth, restore guards and connections, clear personnel from the area, and re-energize the system using the site's approved procedure.
- Tenth, run a controlled operational test. Check for a consistent pulse, leaks, abnormal noise, and normal collector performance. Record the inspection and any parts replaced.
Use inspection results to plan maintenance
If the valve passes inspection and operates consistently, document the result and continue monitoring it. If a fault returns after a repair, investigate the root cause, such as contaminated air, excessive cycling, incorrect pressure, or an unsuitable valve specification. Repeatedly replacing diaphragms without correcting the cause can increase cost and downtime.
How do you replace a Dust Collector Valve safely?
Confirm compatibility before removing the old valve
Match the replacement to the existing system and application. Compare the complete model information rather than relying on appearance alone.
- Valve type and intended dust collector application.
- Port size, connection type, and installation dimensions.
- Operating pressure range and required airflow performance.
- Solenoid voltage, electrical connection, and control method.
- Body, diaphragm, and seal materials for the site's temperature and environment.
- Manufacturer service parts, warranty terms, and technical support availability.
Replace the valve in a controlled sequence
- First, verify the replacement part number and compare its specifications with the approved equipment documentation.
- Second, shut down the collector and apply site lockout and tagout procedures to electrical and pneumatic energy sources.
- Third, confirm that the air line is depressurized. Never rely on a closed valve alone as proof that pressure has been removed.
- Fourth, label and disconnect electrical leads and air connections as applicable. Keep dirt and debris out of open ports.
- Fifth, remove the old valve using the correct tools and inspect the mounting surface, manifold, and fittings for damage or contamination.
- Sixth, install the replacement according to the manufacturer's instructions. Use approved seals and fittings, and do not overtighten fasteners.
- Seventh, reconnect the air line and electrical wiring according to the diagram. Check that the valve is aligned and that cables and tubing are not strained.
- Eighth, restore power and air using the approved site procedure, then test the valve for correct operation and leaks.
- Ninth, document the new model, installation date, test result, and reason for replacement in the maintenance record.
Use a service kit when repair is appropriate
A diaphragm or seal kit may be a cost-effective option when the valve body and other major parts remain in good condition. Confirm that the kit matches the exact valve model and revision. If the body is cracked, badly corroded, or repeatedly failing, compare the cost and reliability of repair with replacement of the full valve assembly.
What common mistakes should you avoid?
Avoid unsafe work and guesswork
- Do not open a valve or air line before isolating and verifying electrical and pneumatic energy.
- Do not diagnose every weak pulse as a failed valve; check the controller, solenoid, wiring, and air supply too.
- Do not select a replacement by appearance or port size alone. Verify the full specification.
- Do not use an unapproved diaphragm, seal, or repair kit that may not suit the valve material or operating conditions.
- Do not overtighten fittings or fasteners, which can damage threads, seals, or the valve body.
- Do not ignore air contamination, excessive cycling, or incorrect pressure after replacing a worn part.
- Do not return the system to service without checking for leaks and confirming reliable operation.
Keep records to prevent repeat failures
Record the valve model, location, operating symptoms, inspection findings, parts used, and test results. These records help maintenance teams identify valves that fail unusually early and help purchasing teams compare replacement cost, service support, and expected maintenance needs.
How can buyers choose a valve that lasts longer?
Compare application fit and total ownership cost
For purchasing teams, a low purchase price does not necessarily mean a lower long-term cost. Include labor, replacement parts, compressed-air use, downtime, and the effect of poor cleaning performance in the comparison. Ask suppliers for written specifications and support information relevant to the operating conditions.
- Confirm that the valve is intended for the collector design and duty cycle.
- Compare pressure, voltage, port size, connection type, and environmental ratings.
- Ask about diaphragm and seal materials, replacement kits, and parts availability.
- Request the manufacturer's cycle-life rating and the conditions used for that rating.
- Check warranty coverage, delivery lead time, technical assistance, and documentation.
- Evaluate whether a compatible valve can be serviced without replacing the whole assembly.
Build a practical maintenance plan
Set inspection intervals based on operating hours, cycle rate, dust conditions, and manufacturer guidance. Review maintenance data after each inspection and adjust the plan if failures become more frequent. A suitable valve, clean compressed air, correct installation, and timely repairs can help extend service life, but no maintenance plan can guarantee a fixed number of years.
How should you estimate replacement timing?
Use evidence from the system and the manufacturer
Estimate replacement timing by combining the manufacturer's service guidance with actual performance history. Consider planned replacement when inspection reveals damaged parts, recurring leaks, unreliable pulsing, or repair costs that exceed the value of continued service. Where the valve remains reliable, continue monitoring rather than replacing it solely because it has reached an arbitrary age.
In short, the life of a Dust Collector Valve depends on its duty, air quality, installation, and maintenance. Inspect it safely, verify the cause of any fault, and choose a compatible repair or replacement based on evidence. Xingyu can help buyers review dust collection valve options and product details. Keep the Dust Collector Valve specification and maintenance record available so your team can make the next service decision with confidence.