News
News
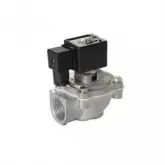
To identify a worn diaphragm in a Xingyu Dust Collector Valve, first make the system safe, then check for air leaks, weak or irregular cleaning pulses, and changes in compressed-air consumption. Next, inspect the diaphragm and valve seat for wear, compare the part with the correct model specifications, and replace damaged components before testing the valve under operating conditions. This staged approach helps first-time maintainers avoid guesswork while giving experienced technicians a repeatable diagnostic process—and it prevents a diaphragm problem from being mistaken for a faulty solenoid, pilot passage, or air supply.

In a pulse-jet dust collector, the diaphragm is the flexible sealing and actuating element inside the valve. A pilot signal changes the pressure balance across the diaphragm, allowing the main valve to open briefly and deliver a high-volume compressed-air pulse to the blow tube. When the diaphragm seals and responds correctly, the pulse is sharp and repeatable.
As the diaphragm ages, heat, pressure cycling, abrasion, incompatible condensate, or incorrect installation can affect its flexibility and sealing surface. The result may be poor cleaning performance, excess air use, or a valve that does not close. The following Signs Your Dust Collector Valve Diaphragm Is Worn help narrow down the cause, but no single symptom proves the diaphragm has failed.
| Observed symptom | Possible diaphragm issue | Other checks to make |
|---|---|---|
| Continuous hissing or air leakage | Cracked, distorted, or poorly seated diaphragm | Valve seat, fittings, pilot valve, and tubing |
| Weak or inconsistent cleaning pulse | Diaphragm is stiff, damaged, or not lifting fully | Supply pressure, air receiver, blow tube, and pilot signal |
| Valve responds slowly or sticks | Loss of diaphragm flexibility or contamination | Pilot orifice, solenoid coil, and air quality |
| Higher compressed-air consumption | Valve may be leaking or staying open too long | Pulse duration, controller settings, and leaks elsewhere |
| Dust-cleaning performance declines | Insufficient pulse energy may leave filters loaded | Filter condition, differential pressure, and cleaning sequence |
Start with the valve installed and the system operating only if site procedures allow it. Listen for continuous leakage between pulses and observe whether each valve fires cleanly and consistently. Compare similar valves on the same manifold; one valve behaving differently can be more informative than a general change in system performance.
A hissing valve is a useful clue, not a diagnosis. A loose fitting or pilot leak can produce a similar sound, so continue with a structured check.
Before replacing a diaphragm, verify that the solenoid receives the correct control signal and that pilot tubing and passages are clear. Confirm that the compressed-air supply meets the valve manufacturer’s operating requirements and is not restricted by a blocked filter-regulator, undersized pipework, or excessive moisture.
If the electrical command is absent, the coil does not actuate, or pressure falls sharply during firing, address that fault first. These checks help distinguish a worn diaphragm from a control or air-delivery problem.
If symptoms remain, follow the site lockout/tagout procedure. Isolate electrical power and compressed air, then release trapped pressure and verify zero energy before disassembly. A pulse valve can retain pressure even after the main supply is shut off.
Remove the valve cover according to the model-specific instructions. Inspect the diaphragm for visible splits, pinholes, hardening, swelling, permanent deformation, edge damage, or embedded debris. Examine the sealing bead and valve seat as well: a new diaphragm may not seal against a damaged or contaminated seat.
Replace the diaphragm if it has a tear, a damaged sealing edge, clear hardening, swelling, or permanent distortion—or if it fails to restore reliable operation after the pilot path and seat have been cleaned and checked. If the diaphragm looks intact but the valve still leaks, inspect the seat, spring, pilot assembly, and cover for wear or incorrect assembly.
For material verification, ask for the elastomer type and applicable test documentation. ASTM D412 covers tensile properties of vulcanized rubber and thermoplastic elastomers, while ASTM D573 addresses heat aging in air. These tests can help evaluate material properties, but they do not by themselves certify that a diaphragm is compatible with a particular valve or operating environment. Confirm chemical compatibility, temperature range, pressure conditions, and model fit with the supplier.
Use the correct replacement diaphragm and any specified service kit components. Follow the valve instructions for orientation, fastening sequence, and tightening torque; over-tightening can distort the diaphragm or cover, while incorrect positioning can create immediate leakage.
Record the replacement date, valve model, diaphragm material, observed fault, and test results. That maintenance history makes repeat failures easier to identify and supports better spare-parts planning.
Consider a plant where one valve hisses between cleaning pulses and the nearby filter section shows a gradual rise in differential pressure. The maintenance team first checks the controller signal, pilot tubing, and manifold pressure. Those checks are normal. After isolating and depressurizing the system, technicians find a hardened diaphragm edge and debris on the seat. They clean the seat, install the model-matched replacement, and verify leak-free closure and consistent pulses before returning the valve to service.
This is an illustrative troubleshooting scenario, not a guaranteed repair outcome. Its key lesson is to check the entire actuation path: replacing a diaphragm without inspecting the seat or pilot system may leave the original fault unresolved.
When contacting Xingyu about a replacement, provide the valve model, operating pressure, temperature, media conditions, and clear photos of the valve and removed diaphragm. Ask for the compatible part number and available material or inspection documentation. If response time matters to production, request a written service timeframe, such as a response within 24 hours; do not assume a specific turnaround unless it is confirmed.
A weak pulse may come from low supply pressure, a blocked pilot orifice, a faulty solenoid, or a damaged filter system. Compare the suspect valve with a known-good valve and test each part of the actuation chain before ordering components.
Diaphragms can differ in dimensions and elastomer formulation even when they appear alike. Match the valve model and part number, and verify material compatibility with the actual temperature and compressed-air conditions.
Check for dirt or damage on the seat, incorrect diaphragm orientation, uneven cover fastening, and debris in the pilot passage. Depressurize the system before reopening the assembly.
Review air quality, operating temperature, pulse frequency, and pressure spikes. Repeated diaphragm damage may point to a system condition rather than a defective replacement part. Use maintenance records to identify patterns by valve location and operating duty.
The most reliable way to respond to the Signs Your Dust Collector Valve Diaphragm Is Worn is to observe the symptom, rule out electrical and pneumatic causes, inspect the diaphragm and seat safely, and test the repair under controlled conditions. A Xingyu Dust Collector Valve that receives the correct diaphragm, clean air, and model-specific installation can deliver more consistent pulse cleaning—but the final result depends on the complete system and its operating conditions.
In short, treat continuous leakage, irregular pulses, slow response, and rising air use as prompts for diagnosis, not automatic proof of diaphragm failure. Confirm the valve model, document what you find, and replace worn parts with compatible components. Following these steps turns Signs Your Dust Collector Valve Diaphragm Is Worn into a practical maintenance plan that supports reliable dust collection and avoids unnecessary part changes.